First, We get the case out of it's box.
"Some things in this Fractal POP Air are not original. For one, the model I have had no ARGB fans so I installed a single Thermaltake fan on the front and two as top exhaust.
Also that Wing badge on the front was pulled from my previous BITFENIX Case.
Also the photo above is outdated as it was taken before my AM5 Upgrade)
Not captured on my iPhone 15 Pro's camera was when I got a static discharge from the case.
I guess it built up that single charge while it was on transit.
Anyway, back to the build,
Next is the power supply.
This is a Corsair RM850E PSU and it's Fully Modular.
Anyway, back to the build.
Which the Fractal North does but....
connect all them modular cables to the Power Supply,
Some cases let you put the PSU and it's cables through one of the the sides, some require you to string it through the back with that screwable back panel.
Also, the PSU Fan should be pointed downward.
Reroute all the cables we actually need.
For this build, we just need the CPU, Motherboard, and PCIE cables
The PSU came with cables for SATA, Molex, and other PCIE and CPU cables as well as Corsair's own 12VHPWR for RTX cards 4070ti or higher. But we are not using them.
Oh the beauty of Fully Modular Power Supplies.
then we put the motherboard on top of it’s box for ESD protection.
You’ll notice I’m not wearing gloves or a wrist strap.... aside from my Apple Watch.
I never needed a wrist strap or gloves during a PC Build or upgrade. If I built my own machines and performed a case swap without a wrist strap, there’s no need for them. My bare hands are all I need….
Of course how do I ground myself? Just touch the metal part of the case… with the power supply mounted that and connected to power but don't turn on the PSU yet.
And make sure to work on an area where there’s no static sensitive elements….
The wood table I was working on is just fine.
Also, the Box where the motherboard came from also is good ESD protection too.
Next is the RAM.
This is 32GB of Corsair Vengeance DDR5 Dual Channel Ram.
This means they're two 16GB DDR5 Ram sticks which need to work in tandem in order to use their full potential.
But where to put it?
But where you may ask?
Just refer to these photos I took during the installation.
Now it’s time for the SSDs.
In this day in age, SSDs are preferred for storage because with that, you get faster performance as well as better reliability.
Anyway, those SSDs I'm installing are 1TB of SAMSUNG 980 Pro. There are three in total that I will be installing.
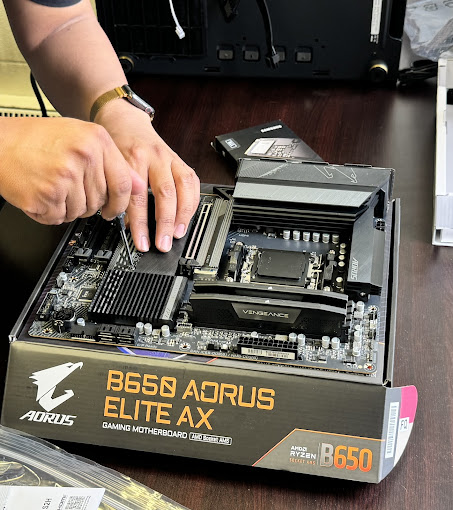
First, we remove the heat sinks for the SSDs,
then we take the tape off the thermal pads of both the heat sink and motherboard.
These are the only photos of I have of me removing the protective film off the heatsink. That lone heatsink closest to the CPU socket does have the film but I forgot to get a photo of that.
This GIGABYTE AORUS Motherboard has these nifty latches to secure the SSDs.
Are they trying to make it tool-less for use builders?
Now we put the heat sinks back, And screw them back into the motherboard.
Now we put the CPU in.
this Ryzen 7 7700x is an LGA CPU, which means the contacts are on the CPU itself,
The pins are on the motherboard, just like Intel’s sockets since 2004.
And open the CPU Socket Cover
I've seen videos on You Tube, Facebook and TikTok where people just leave the cover intact during CPU installation because the builders know the cover will snap off during closing of the CPU Cage.
But For me, I just prefer to pop off the cover with my fingers before CPU Installation.
Now we put the CPU in place.
Then we close the latch and secure it in.
Next is the cooler.
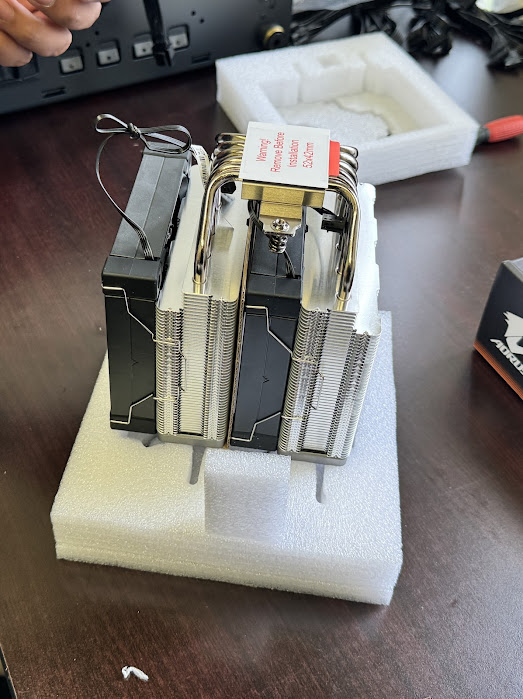
But first, we need get the cooler out of it's box
Before every cooler installation regardless if it's air cooler or an AIO, always remove the protective sticker off the metal contact.
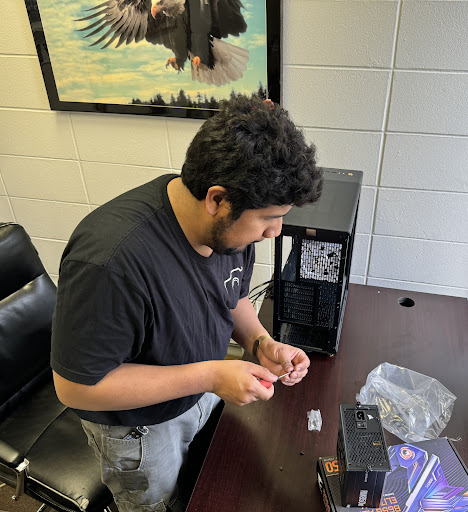
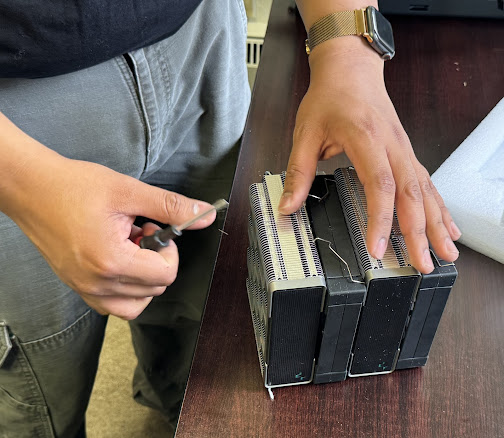
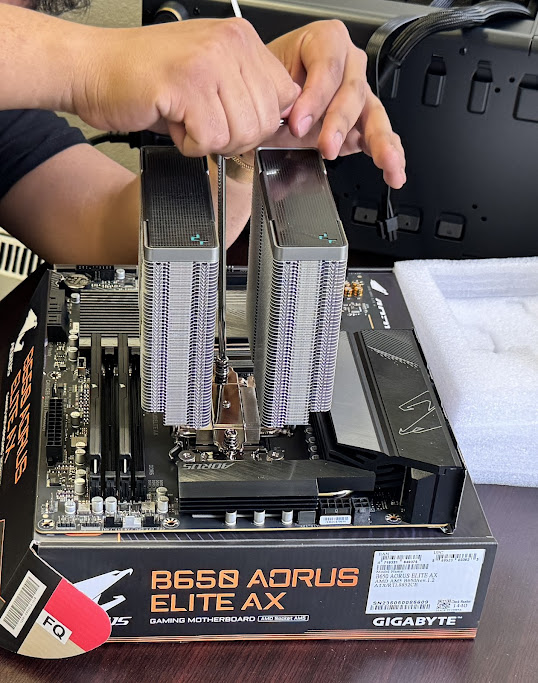
This step is for DOUBLE FAN Heatsinks like this DeepCool AK620 here. If there's a mounting screw on these, I need to remove one of the fans.
The way I do this is to put my screwdriver on the mounting clips to unclip the mounting clips.
Now we can get to mounting.
Now to apply some thermal paste on the CPU.
This DeepCool AK620 Air Cooler came with it’s own DeepCool thermal paste but I’m using my own dollop of my CORSAIR HIGH PERFORMANCE XTM50 paste.
That was the plan but DeepCool suggested 5 dots in an X shape.
Hope this works out well.
Now we put the cooler on top of the CPU.
Now to reattach the fans to the heatsink
We put the screws in.
After the board is secure, it’s time for the Power supply connections.
First is the CPU, Then the 24-pin ATX motherboard Cable, Then the front facing fans, Then the rear exhaust fan,
Some cases have a rear fan like my Fractal Pop Air.
But this North Case doesn't have a rear fan.
Believe it or not, I pulled this rear exhaust fan from my FRACTAL POP AIR CASE
Now to connect the fans to their respective fan headers.
You can choose to connect the two front fans to different headers.
I'm just going to daisy chain the fans just for better cable management.
Then comes the CPU fans.
They come with their own cable so I connect the two to it's daisy chain cable.
then connect it to the motherboard's CPU Fan header.
Then I connect the USB 3.0 Header to the motherboard.
As well as the USB-C Connector to it's motherboard header.
Now it's time for the power button.
Don't get these mixed up or you’ll blow something up.
As well as the audio for top panel ports.
Now it’s time for the graphics card.
This RTX 4070 looks like a beast but its shroud is slightly smaller than my RTX 4080.
At least the shroud is more befitting of a two bracket card. While my 4080 is a two bracket GPU, it's massive shroud makes it scream
"BUT I SHOULD HAVE HAD 3 BRACKETS! WHY GIGABYTE WHY!?"
It's all right 4080. You don't have to whine about your bracket no more.
Just like my RTX 4080, this Windforce 4070 is a PCI-E x16 card so it needs to go to its respective x16 slot.
That's the top one.
Better screw in the Bracket to secure the card.
The Fractal Series of cases are known for using Thumb Screws for their PCI-E brackets but you still need a screwdriver to secure the screws in place, especially for cards that are bigger like an RTX 4090.
Now it’s on to connecting the PCI-E cable to power the card.
Now it's time to close up the case.
But first, remove the protective film off the tempered glass.
Do this on both sides.
Put the panels back
Secure the panels with thumbs screws
We did turn on the Machine and it POSTED first time around without any problems.
And the DDR5 memory training didn't take long despite what I've read online.
Such a thing of beauty.
And this is where I’ll end my post. The operating system, Drivers, software, etc. Will be done off screen.












No comments:
Post a Comment