Monday, April 29, 2024

Should my Frieza Funko Pop be considered my equivalent to Jerry Seinfeld's Tweety Bird Pez Dispenser?

Next year, it'll be the 10th anniversary of my possession of my only Funko Pop I have in my collection.


That being my FRIEZA FUNKO POP.

That photo above is of my Frieza Funko Pop which was taken using Nexus 5 smartphone back in 2015. The original photo was probably a higher resolution but I don't have the original photo anymore. I just took this photo straight off my Facebook timeline.


but it's also got me thinking, should this Frieza Funko Pop be considered my equivalent to Jerry Seinfeld's Tweety Bird Pez Dispenser?


I highly doubt I'll make anybody laugh like Jerry did when his Pez dispenser made Elaine laugh


But then again, the episode was from 1992 while my Funko Pop was given to me in 2015.

For those who are wondering, Yes, Dragon Ball Z Pez Dispensers do exist though you can only find those in Japan or places that sell imported items from Japan like the Anime store at Aberdeen Mall in Richmond, BC.


I did manage to find photos of those Pez Dispensers but sadly, the only Frieza Pez Dispensers I could find were either of his First Form or his Mecha form.

Which is weird because my Frieza Funko Pop uses his acclaimed FINAL FORM.

"Ohohoho. Both Eduard Haas and Akira Toriyama would be rolling in the clouds knowing that they used my first form instead of my better received Final Form which is preferred by the fandom."

Thank you Frieza.


Anyway, I still have my Frieza Funko Pop to this day. 

Here he is sitting above both my ASUS main monitor and my PC, as well as next to my Logitech Speakers and in front of my Acer Third Monitor. 

Plus, He's accompanied by my Midna Amiibo.

And unlike the 2015 photo, this new photo was taken on my iPhone 15 Pro. 
Phone technology is amazing.

Backburner posts as well as my airport job strike again. But I don't want to suffer writers block again like I did last year.

Also, there may be a slight delay in posts in May due to the Vancouver Canucks playing this season and well.... I'M A CANUCKS FAN.... so I need to support my team fervently.

Update as of June 23 2024:
The Canucks didn't make it this season. Instead, The Oilers did.

We'll be back in 2025. We promise.

Also, I got a Pikachu Pez Dispenser but I'm debating making a post about him or not.

Friday, April 26, 2024

Punch that Thief with references-Lupin III’s Mad Magazine inspiration

As many a fervent fan knows, Kazuhiko Kato, AKA Monkey Punch, was inspired by MAD Magazine when he created the Lupin III manga.

For those who don’t know about his origins and have only watched the anime, The original 1967 manga is more crazy, more dark, and more lewd in content…

Though not as lewd as some later comics down the line like OMAHA THE CAT DANCER.

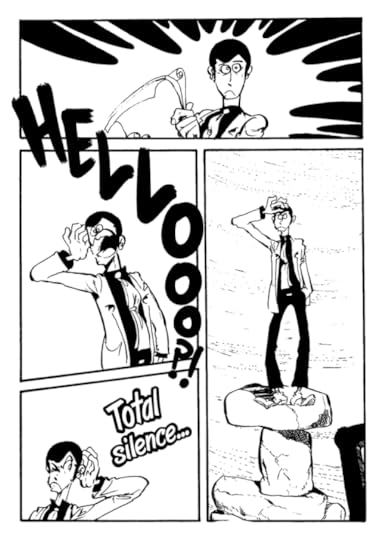
What I find so fascinating about the manga original is not just the plot lines but rather how funny the original manga art looks. 
This ain’t your clean as a whistle, on-model Lupin you’re familiar with on tv. This is the original 1967 crazy and lewd deal here….. though the manga examples I’m providing are the more comedic examples because I choose to do so.

But yeah, these manga examples with their exaggerated features just scream FUNNY CARTOON. 

Like I said, Monkey Punch was influenced by MAD MAGAZINE when drawing the panels for the manga. 

I heard a rumor that PUNCH himself was inspired by Sergio Aragones’ artwork.

So it got me thinking, while I was on the hunt for more Lupin Manga  panels, I was also wondering if Lupin also referenced other artists. After all, Mad Magazine was not all Aragones.

Mad Magazine had other artists too.

Don Martin is one of them
I'm using this TALENT SHOW cartoon as an example because 
I can't find my BEACH CHAD cartoon which is a personal favorite Don Martin cartoon of mine.

I can pretty much concur that Lupin probably never referenced Don Martin's cartoons.... maybe I'm just not looking hard enough.

I know that I've seen someone making remarks that one pose from this particular panel shown below may have been inspired by Bob Dunn's LITTLE IODINE.


Here's another BOB DUNN inspired Panel from Lupin's manga.


You know what, I'm just going to show you a bunch of Lupin Panels.


Truly a great achievement in the poses and MAD MAGAZINE aesthetics.
Even if the anime stuck to these designs instead of the Industry Mandate Designs enforced on the gentleman thief, Lupin would still be portrayed by Yasuo Yamada because Lupin isn't the same without his late seiyuu.(I don't care for Kanichi Kurita, I prefer the original Yasuo Yamada.)

Speaking about all the anime that succeeded the manga, I can hazard a guess why the companies forced Monkey Punch to redesign his characters


The reason for the characters in LUPIN being redesigned to be..... ANIMATABLE according to Japanese executives as well as art directors is because these types of professionals do this thing called market research and according to their market research, the viewers would rather want ON-MODEL AND CONSISTENCY to the artwork.


It's been a rule set in stone by WALT DISNEY

And later enforced by Hanna-Barbera due to television budgets

So as a direct result, Lupin is not allowed to have designs as close to Monkey Punch's original designs as one would have it.
The original GREEN JACKET series which I'm mostly showing here is an example of a show who's staff fought hard to keep true to the original source material but the original artists clashed with executives real hard and lost.

Masaaki Osumi direct the first 7 episodes of the Green Jacket series alongside episodes 9 and 12 but when it became clear the series debuted to poor ratings, he was fired when he refused to listen to the demands from the executives.

Then the Executives hired a certain duo to finished the remainder of the series.

Those two people were:

Hayao Miyazaki


and the Late Isao Takahata.

They retooled the series to what they think is more marketable for television while at the same time, still make the series geared towards the intended adult audience that the original Manga was for.


Of course, this clearly had an effect on the design for some characters in this first series.
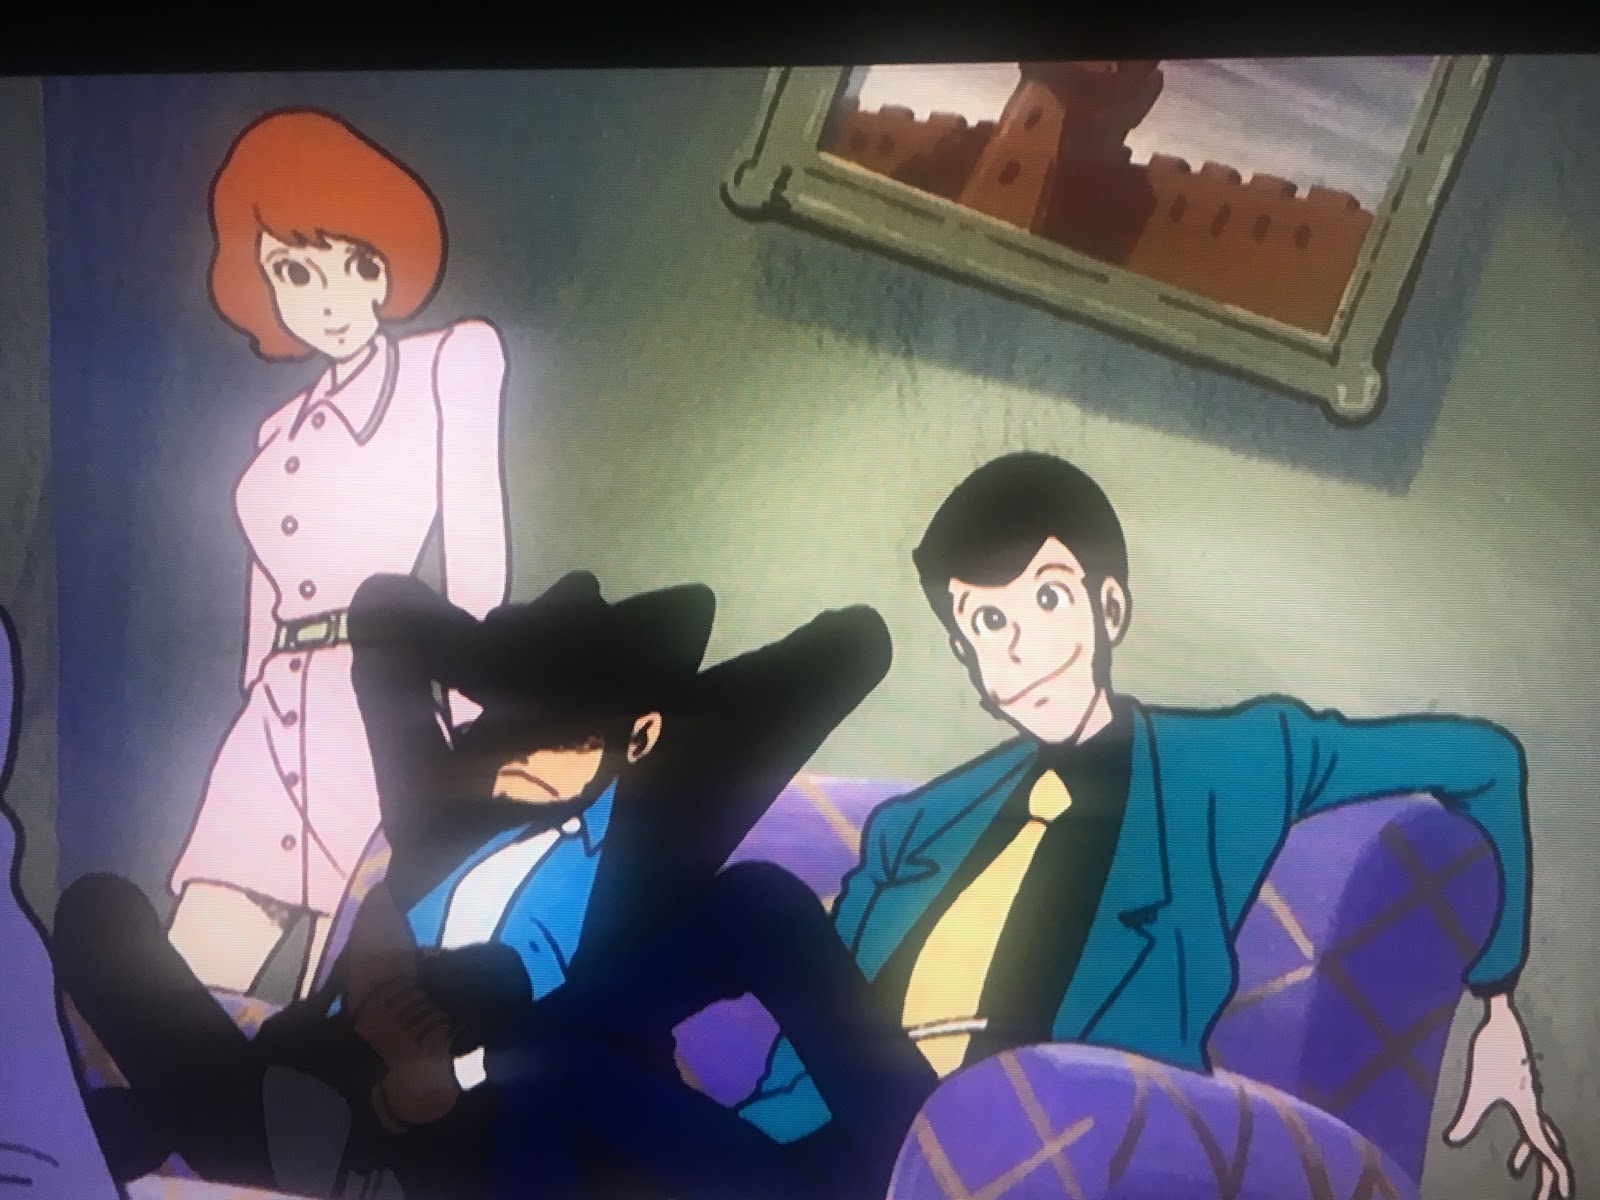
And this is more noticeable with Fujiko Mine.


Here she is in the earliest of episodes directed by Masaaki Osumi

And here's Fujiko when Miyazaki and Takahata took over.

Despite all their best efforts, the ratings did not improve and Lupin was cancelled after it's last episode aired in 1972.

Then the reruns happened and suddenly, Lupin became popular.

So popular, that it greenlit the later and better known RED JACKET series in 1977.
This series aired for most of the late 70s and until the very start of the 1980s and it led to two films from that particular era.


The first being MYSTERY OF MAMO in 1978

And most famously CASTLE OF CAGLIOSTRO in 1979.

The later adaptations went through multiple artists and changed Lupin's jacket and inner shirt color for better or for worse


Even later on giving Lupin his ray-traced appearance in CG in 2019.


And yes, Lupin III:The First was animated with AUTODESK MAYA. I have this behind the scenes screenshot to prove my research......

Well, the film was animated on MAYA but I also read that Lupin's character models were also made using ZBRUSH but let's just say MAYA was used for the rigging and the animation as well as rendering. 

Substance Painter most likely was used for textures.

About the rigging, LUPIN's face was rigged using mGear as well as Maya's SoftMod Deformer.


And one last thing before I close this post:

Here's one screenshot from the 1971 Green Jacket Series where someone is reading MAD MAGAZINE while in a plane.
What article or cartoon is that passenger reading? You tell me in the comments.
Also, that yellow thing that Zenigata is holding is plane ticket. not a smartphone.
Smartphones didn't exist in 1971.


Wednesday, April 24, 2024

Maverick PC Builder’s Insider 02-Building of the streaming pc. AKA: HOW TO BUILD A PC

I’ve got all the parts needed for my congregation's streaming PC. Now it’s time for the build.
First, We get the case out of it's box. 


Oh that lovely woodgrain panel. I really was wanting to put my main pc in this case 

but relented due to the back panel.


Instead, I got the Fractal Pop Air.
"Some things in this Fractal POP Air are not original. For one, the model I have had no ARGB fans so I installed a single Thermaltake fan on the front and two as top exhaust. 
Also that Wing badge on the front was pulled from my previous BITFENIX Case.
Also the photo above is outdated as it was taken before my AM5 Upgrade)


Not captured on my iPhone 15 Pro's camera was when I got a static discharge from the case. 
I guess it built up that single charge while it was on transit.


Anyway, back to the build,

Next is the power supply.

This is a Corsair RM850E PSU and it's Fully Modular.

While you can build a PC using either a non-modular, or Semi-Modular PSU, I prefer to use a Fully Modular PSU because if you plug in only the cables you intend to use, you save a lot of space in your case.

Anyway, back to the build.


We take the PSU out of the box as well as the appropriate cables

Attach the PSU Back Panel to the Power Supply if the case has that.

Which the Fractal North does but....

check your case to see if it has a screwable PSU back panel.


connect all them modular cables to the Power Supply,


String those cables through the case.

Some cases let you put the PSU and it's cables through one of the the sides, some require you to string it through the back with that screwable back panel.

The Fractal North is one of them.


Now we screw the power supply to the case

Also, the PSU Fan should be pointed downward. 


Reroute all the cables we actually need. 

For now, we just need CPU, Motherboard, and PCIE.

The PSU came with cables for SATA, Molex, and other PCIE and CPU cables as well as Corsair's own 12VHPWR for RTX cards 4070ti or higher. But we are not using them. 

Oh the beauty of Fully Modular Power Supplies.


next, we need to get the motherboard out of it's box


and out of it's anti-static bag,


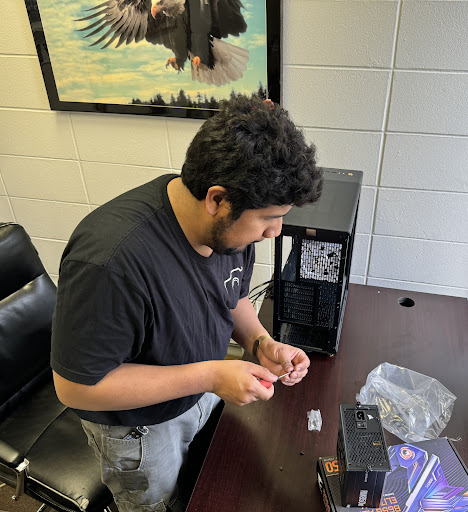
then we put the motherboard on top of it’s box for ESD protection.


You’ll notice I’m not wearing gloves or a wrist strap.... aside from my Apple Watch. 
I never needed a wrist strap or gloves during a PC Build or upgrade. If I built my own machines and performed a case swap without a wrist strap, there’s no need for them. My bare hands are all I need….

Of course how do I ground myself? Just touch the metal part of the case… with the power supply mounted that and connected to power but don't turn on the PSU yet.

And make sure to work on an area where there’s no static sensitive elements….

The wood table I was working on is just fine. 

Also, the Box where the motherboard came from also is good ESD protection too.


Next is the RAM.
This is 32GB of Corsair Vengeance DDR5 Dual Channel Ram.
This means they're two 16GB DDR5 Ram sticks which need to work in tandem in order to use their full potential.

But where to put it?

Furthest away from the socket. THAT'S WHAT!
But where you may ask?

Just refer to these photos I took during the installation.

Make sure the RAM is secured in place.

*CLICK*


Now it’s time for the SSDs.
In this day in age, SSDs are preferred for storage because with that, you get faster performance as well as better reliability.

Anyway, those SSDs I'm installing are 1TB of SAMSUNG 980 Pro. There are three in total that I will be installing.


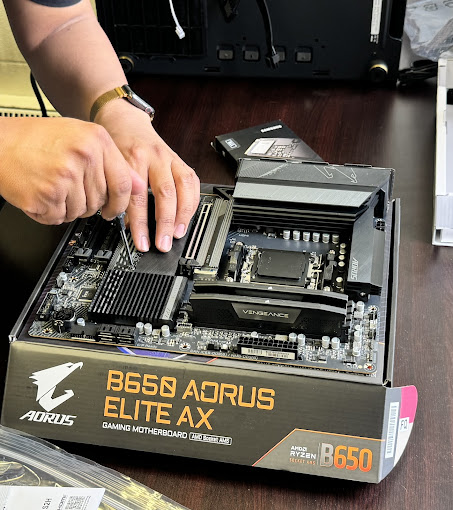
First, we remove the heat sinks for the SSDs, 


then we take the tape off the thermal pads of both the heat sink and motherboard.

These are the only photos of I have of me removing the protective film off the heatsink. That lone heatsink closest to the CPU socket does have the film but I forgot to get a photo of that.


Now we insert the SSDs into their respective slots.

This GIGABYTE AORUS Motherboard has these nifty latches to secure the SSDs.
Are they trying to make it tool-less for use builders?


All done. The SSDs are now in place on their respective slots.


Now we put the heat sinks back, And screw them back into the motherboard.


Now we put the CPU in.

Unlike the AMD Ryzen 9 5900x I was using during the time I was building this PC, 
this Ryzen 7 7700x is an LGA CPU, which means the contacts are on the CPU itself,


The pins are on the motherboard, just like Intel’s sockets since 2004.

Of course, just like an Intel LGA socket, we need to removed the latch.

And open the CPU Socket Cover

I've seen videos on You Tube, Facebook and TikTok where people just leave the cover intact during CPU installation because the builders know the cover will snap off during closing of the CPU Cage.

But For me, I just prefer to pop off the cover with my fingers before CPU Installation.


Now we put the CPU in place.


Then we close the latch and secure it in.


Next is the cooler.

This is an air cooler by the way.

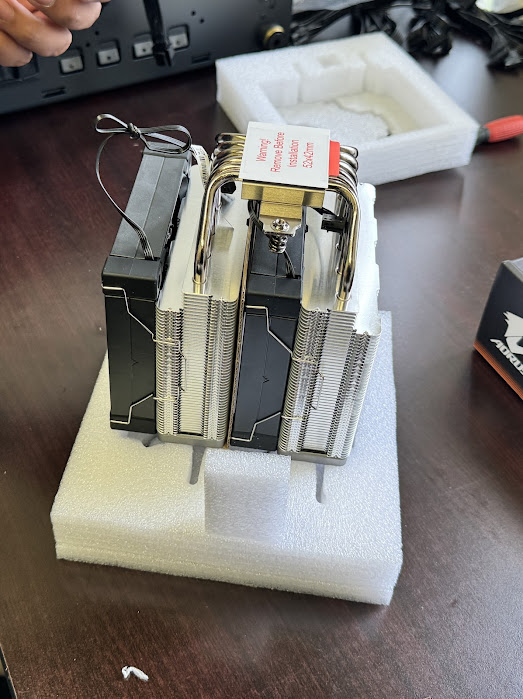
But first, we need get the cooler out of it's box


Before every cooler installation regardless if it's air cooler or an  AIO, always remove the protective sticker off the metal contact.


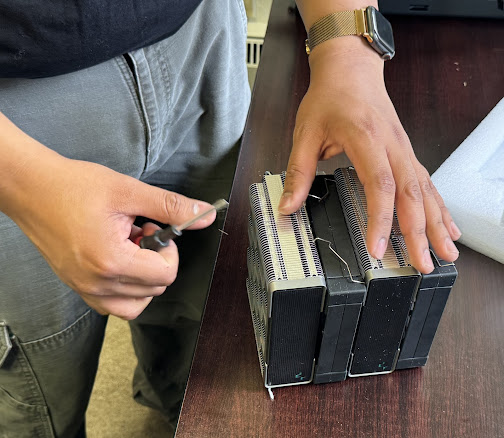
This step is for DOUBLE FAN Heatsinks like this DeepCool AK620 here. If there's a mounting screw on these, I need to remove one of the fans.

The way I do this is to put my screwdriver on the mounting clips to unclip the mounting clips.


Now we can get to mounting.


But first, we remove the default AMD mounting brackets


And install these mounts meant for AMD CPUS.


Now to apply some thermal paste on the CPU.


This DeepCool AK620 Air Cooler came with it’s own DeepCool thermal paste but I’m using my own dollop of my CORSAIR HIGH PERFORMANCE XTM50 paste.


Since the AM5 CPUs are shaped like an asterisk, I need only one tiny dollop of the paste.


That was the plan but DeepCool suggested 5 dots in an X shape.

Oh well, this was how it ended up.

Hope this works out well.

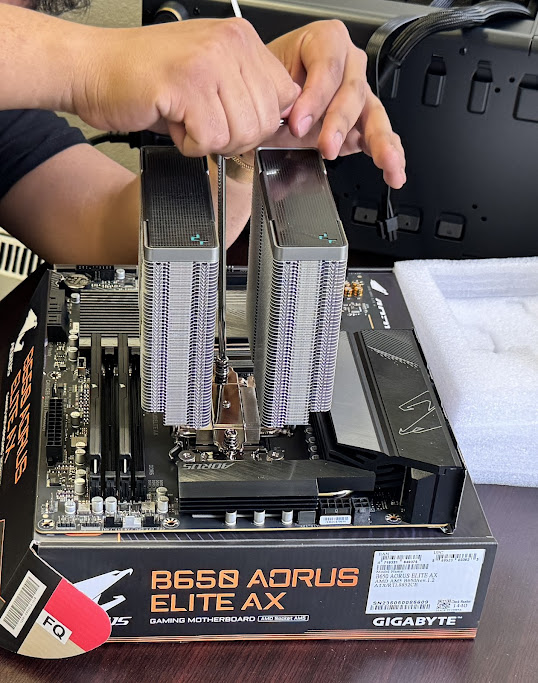
Now we put the cooler on top of the CPU.


To secure the cooler, screw one side but not all the way,


Then do the other.

Now to reattach the fans to the heatsink


I believe it’s now time to put the motherboard inside the case.


Now that it's inside, 


We put the screws in.

Motherboard screws are very specific.

After the board is secure, it’s time for the Power supply connections.

First is the CPU, Then the 24-pin ATX motherboard Cable, Then the front facing fans, Then the rear exhaust fan,


Some cases have a rear fan like my Fractal Pop Air.

But this North Case doesn't have a rear fan.

So I installed one.


Believe it or not, I pulled this rear exhaust fan from my FRACTAL POP AIR CASE


Now to connect the fans to their respective fan headers. 
You can choose to connect the two front fans to different headers. 
I'm just going to daisy chain the fans just for better cable management. 
Then comes the CPU fans. 
They come with their own cable so I connect the two to it's daisy chain cable.
then connect it to the motherboard's CPU Fan header. 
Then I connect the USB 3.0 Header to the motherboard.
As well as the USB-C Connector to it's motherboard header.


Now it's time for the power button.

Don't get these mixed up or you’ll blow something up.

As well as the audio for top panel ports.

Now it’s time for the graphics card.
This RTX 4070 looks like a beast but its shroud is slightly smaller than my RTX 4080.

At least the shroud is more befitting of a two bracket card. While my 4080 is a two bracket GPU, it's massive shroud makes it scream
"BUT I SHOULD HAVE HAD 3 BRACKETS! WHY GIGABYTE WHY!?"

It's all right 4080. You don't have to whine about your bracket no more.

Just like my RTX 4080, this Windforce 4070  is a PCI-E x16 card so it needs to go to its respective x16 slot.
That's the top one.
Better screw in the Bracket to secure the card.

The Fractal Series of cases are known for using Thumb Screws for their PCI-E brackets but you still need a screwdriver to secure the screws in place, especially for cards that are bigger like an RTX 4090.

Now it’s on to connecting the PCI-E cable to power the card.


Now it's time to close up the case.


But first, remove the protective film off the tempered glass.


Do this on both sides.

Put the panels back

Secure the panels with thumbs screws


We did turn on the Machine and it POSTED first time around without any problems.

And the DDR5 memory training didn't take long despite what I've read online.


Such a thing of beauty.


And this is where I’ll end my post. The operating system, Drivers, software, etc. Will be done off screen.