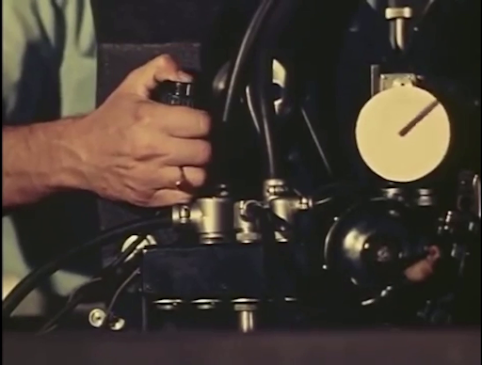
Try asking this Camera Rig shown below.
Now try referencing this video Below.
Through the Multiplane Camera as shown above the video, That's what.
When animation began in it's inception in it's so-called Modern Form of drawings instead of optical projection in the late 1900s with releases such as
Either on paper or on a Chalkboard.
The medium grew and got better with the techniques.
Then it was decreed that the Foreground elements and Background should be separated.
While the top-down view of photographing drawings 24 frames per second retained once the elements where separated,
The art however still looked flat, as in without camera depth.
Can you introduce parallax depth to animation in the same way your eyes see depth as shown in the video below?
That's a question that was asked by many an artist in the earliest days of animation but considering the flatness of 2D art, adding depth was next to impossible...
at least in 1910s and 1920s standards.
So some early pioneers and engineers decided to invent something that would aid the animators and photographers in needing that exact depth they so desired.
Many prototypes existed.
The first of these prototypes were made by LOTTE REINIGER.
She developed an early prototype to this system using her same signature silhouette cutouts layer over thin sheets of velum paper
Of course, this system as used in the earliest of films such as
THE ADVENTURES OF PRINCE ACHMED (1926)
Despite the rudimentary nature of the camera, it proved to many that depth can done animation if you use the right tools.
And it set forth many an engineer and pioneer of that time period to improve on the tech.
One of the most famous of these improvements on making depth actually was ahead of it's competition a good 50+ years before CGI successfully integrated both 2D Cels and 3D Geometry.
All it took was a turn table, hand cranks, good lighting, and a 35mm Camera shot horizontally.
And who made it?
FLEISCHER STUDIOS.
I'm talking about Fleischer Studio's patented STEREO-OPTICAL SETBACK camera,
for which I did a post way back in February 2023 via this link:
https://maverickmartinezarchive.blogspot.com/2023/02/tools.html
This allowed depth in films that not even the competition could dream of.
I highly recommend this VIMEO Link to a video of the SETBACK Camera in action using various examples from Fleischer's Filmography:
Not only to allow for proper parallax behavior when objects go past the camera, but it can also create realistic depth for objects during a susposed camera zoom.
For example, according to Walt Disney himself in the 1957 Disneyland Tv episode TRICKS OF OUR TRADE, he explained that to simulate a proper camera zoom on a Countryside road, the layers would have to separate to allow the moon to remain the same size but still allow some the elements such as the foreground road and the house to zoom in towards the camera.
Before the Multiplane Camera
As you can see above, the moon isn't susposed to
zoom in like that since in real life, the moon remains absolutely still....
With the exception of the fact that it orbits our EARTH.
Now here's how the Multiplane Camera separates the layers.
Only the moon Background remains still.
The others can zoom freely.
Now shot from the Multiplane Camera...
The moon has kept it's proper distance.
Anyway, it wasn't Disney who invented the multiplane camera. He just bought patents for the system from his good old friend Ub Iwerks, and even then, he still didn't even invent it with his own hands. He hired a certain William Garrity to build the DISNEY PATENTED MULTIPLANE CAMERA.
The first cartoon to use this Multiplane Camera was the 1937 short THE OLD MILL.
Of course, if you've seen these films and shorts, you'll notice that the multiplane camera wasn't used all the time. If you've seen featurettes of the camera department in your favorite Classic Disney movies, you'll be shocked to discover that the Multiplane Camera was used in Tandem with the classic standard camera.
That's because photography can screw up in many ways which can result in many retakes.
Things like the lights on the multiplane levels going out, the studio suffering a power outage, the glass breaking, Lenses breaking or fogging up, etc.
Of course, Multiplane scenes aren't prioritized so they can do as many retakes as they so desire while the standard camera scenes get the highest priority during the photography.
The difference between the Standard and Multiplane Cameras aside from the levels of artwork is the amount of operators required.
In the standard camera setup, one operator was enough to.....
Apply the artwork on the pegs,
Move the Background artwork with a hand crank,
Replace each cel,
And press the button to hold the art in place
as well as take a single frame of Animation under the camera.
While the Multiplane Camera would require 5 people to operate it.... probably even more if more layers were added.
Though the extra would be for maintenance.
Lets use this example from when BAMBI was in the process of being photographed back in 1941:
For example, 4 operators would used to operate the layers of artwork,
While the 5th person was in charge of overseeing all the layers of the artwork on his viewfinder as well as operating the same shutter button for the camera.
Dick, the operator here, is in charge of overseeing the Cels to make sure they're perfectly in line with what he's seeing in the Viewfinder.
It's also his job to make sure it's ready before he gives the O.K for the shot to start.
"Everything's ok except the bottom level. What's wrong down there Alan?"
"I was moving it the wrong way Dick. I'm taking it a step back now. How's that?"
"Look's fine now."
*CLICK*
*Motors going because of Camera Exposure*
"Ok, we've got that frame. Let's get set for the next exposure."
This allowed certain scenes to be achieved such as the parallax trees in Bambi,
to the parallax artwork panning and zooming in Watership Down.
Of course, despite all this, the Multiplane Camera was sparingly used due to costs as well as other things to be considered.
Even after various attempts to revive the old-school multiplane camera, they were eventually supplanted with the digital variant on Computers.
The difference between the old school vs digital versions of the multiplane camera is movement.
For example, in the old school Multiplane Camera, the camera never moves. It's actually the layers of artwork that move.
In the digital version, while you can still just move the artwork, the camera can actually move, allowing for you to zoom in towards you artwork. Allowing for scenes that weren't possible in the old school camera such as the zooming canyons in THE RESCUERS DOWN UNDER.
Until I've got the screenshots from my DVD, I'll have to settle with this example from the Intro using flowers since it's also done using the CAPS computer system to demonstrate the Multiplane Camera.
Now here's a minor gripe I have with the multiplane camera:
The artwork is just flat assets regardless of how much detail you put in the assets.
Perfect if you just want something stylistic like these Cacti in the Roadrunner cartoons
but many studios like Disney preferred Hyper-realistic watercolor paintings for backgrounds so they use that for their scenes.
That's one of the reasons why I preferred Fleischer Studios' Setback camera over Ub Iwerks' multiplane camera and why I want to replicate that on my own 2D Animations using CG Assets since ToonBoom allows for that level of integration.
But the fandom has this fierce belief that 2D art and 3D assets don't mix....
For some reason, I don't have an image of Comic Book Guy being all smug so instead, I'm using this image of Doug the College Nerd from THE SIMPSONS.
But at the sometime, if you want depth added to your animations, you need to be committed to the task and effort to do so.
Many an animation fan would rather prefer if the artist would just draw in perspective like those perspective shots done by Ollie Johnston and Richard Williams.
Or those perspective shots in the original Japanese Macross.
but nobody in today's animation has that level of skill or patience to do something like that. That's why both the setback and multiplane cameras exist in the first place.
That's also why Xerography also gave way for photographing 3D cardboard cutouts of vehicles like Cruella's Car in 101 Dalmatians.
That's also why John Lasseter pushed for 3D Backgrounds done on the computer in his WHERE THE WILD THINGS ARE test animation in 1983.
I think the problem is that artists want to use 3DCG BGs for attempting proper perspective for their 2D Animations without losing detail but to hide the CG aspect of their assets was the one thing that gave CG Artists a headache.
One common thing that was done by artists to properly integrate 2D and 3D using the old school cel method was to first plot out the CGI via wireframes
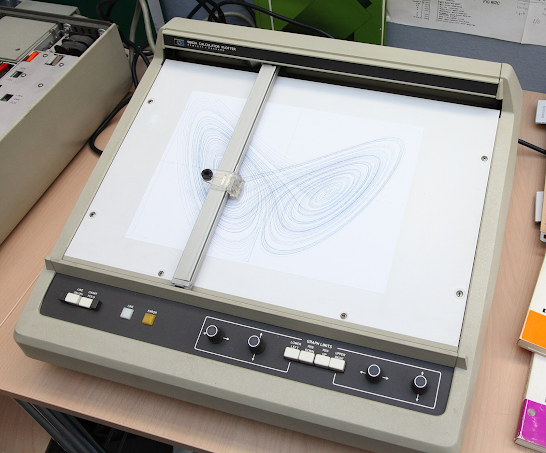
Then print out those wireframes using an HP Line Plotter.
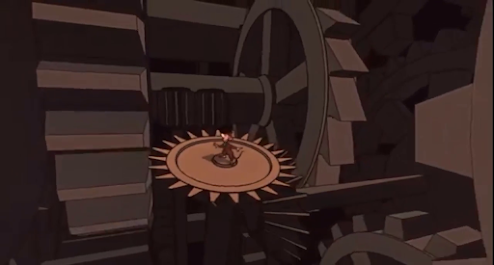
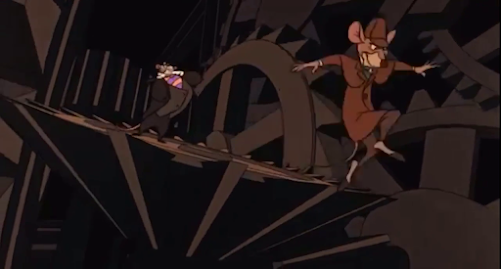
That's what gave us those Cel Shaded cinematography in GREAT MOUSE DETECTIVE.
I've read many conflicting comments where people say the Animators traced the wireframes on paper but how can you trace wireframes with paper put in front of a convex curved CRT Monitor?
Also, the documentary for MOUSE DETECTIVE had one of the animators state they used a mechanical hand with a ball point pen draw what's on the screen but I highly doubt any Disney Animator in Glendale, California had the engineering knowhow for that.
My belief is that the animator's bought an HP Plotter to print out the wireframe animation on paper before taking the wireframes over to the Xerox Process.
But before the Xerox Process, the animators have to draw the character animation on top of the wireframe prints.
This technique later persisted with OLIVER AND COMPANY and LITTLE MERMAID.
Before being completely supplanted with the CAPS Computer Process which allowed certain scenes like the famous Ballroom sequence in BEAUTY AND THE BEAST.
As beautiful as the Ballroom sequence is in BEAUTY AND THE BEAST, it didn't convince many artists to merge the two mediums together seamlessly since the Ballroom looked too ray-traced for the 2D drawings of Belle and Beast to be convincing. Plus, not all animators are willing to animate strictly on ONES like the Disney Animators did.
But the Ballroom did inspire some artists to experiment with the technique used in BEAUTY AND THE BEAST to allow better integration of both 2D and 3D without the heavy clashing of drawings and Ray-Traced renders.
So in the late 90s, during the production of TARZAN, the artists were hard at work on working on a plugin for AUTODESK MAYA to allow for painterly BGs on their CG BGs called DEEP CANVAS.
But there was also another alternative if a bit cheaper.
In 1998, MULAN gave way for a new Multiplane Camera technique known as FAUX-PLANE.
This allowed for the artwork to be in 3D but without the CG Geometry that DEEP CANVAS required.
All the artist needed to do was construct the assets in flat 2D art as if they were cutouts, then they are brought into an art software package to be attached to each other, then manipulated to allow for a faux-3D look to the artwork.
But only MULAN used FAUX-PLANE due to the cheaper production costs that film used when compared to TARZAN since that was given the highest priority for VFX.
So how did TARZAN achieve CGI Backgrounds but still keep the painterly texture?
Easy:
Just construct the 3DCG Polygons required for said backdrops, then apply the DEEPCANVAS texture system to the geometry, then reel it in with the various paints using a WACOM TABLET.
Then hide the CG Geometry but keep just the painted textures visible.
I heard the Disney's Artists had to go through multiple passes before painting further in the film but in the end, it allowed for some beautiful cinematography.
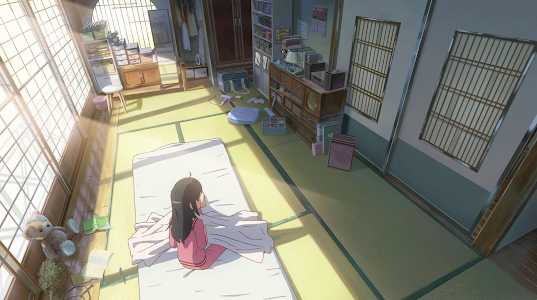
I think the only Japanese anime film to use this technique was YOUR NAME from 2016 and that was only used for Mitshuha's bedroom in her POV shot.
Everything else in BG design in YOUR NAME was either digital gouache painted BGs or Cel-shaded CGI like the trains and cars.
I do want to spice my animations thoroughly so when I do walk cycles, I don't want white backdrops or just plain old flat Drawings or photos for the environment.
So one of my walk cycles used my own take on the Multiplane Camera. For example, here's a walk cycle of my character MEGUMI YOSHIDA walking in the forest, all drawn by hand.
And the background is moving behind her.
Another difference between the multiplane shots of old vs now is in the old school camera, the artwork moves via camera exposures done frame by frame.
Now with the computer and with software such as Toon Boom, you can just set the keyframes and let the algorithm just move the camera smoothly.
You can still use the old school keyframe technique on Toon Boom though if your multiplane shots need to be very specific.
Regardless, I think Toon Boom's system of Multiplane camera is 10x better than the version used in DISNEY's CAPS system since it can be done on a GUI system than by a COMMANDLINE window...
That and the fact that TOONBOOM software works on GUIs like
WINDOWS,
MAC OS,
or any flavor of LINUX.
Anyway, that's my post on the Multiplane Camera.
See you next blogpost.








No comments:
Post a Comment